
Now I could start to slowly piece together the foot pieces...
 |
| Foot details are installed, the top piece, sides and half-moon... |
Then I removed the painter's tape on the shoulder horseshoes and installed the detail pieces on those.

|
| Foot details are installed, the top piece, sides and half-moon... |


 | |
| A hacksaw is all I need to use to remove the laser-cut panels. They leave just enough material un-cut to hold the skin pieces together. |
 | ||
| A few simple cuts and the rear panel is out. This is going to eventually piece a removable panel to access R2's insides. |
 |
| Label the pieces! This way, when it is time to bond them back together, you have some clues to remind you what went where! |

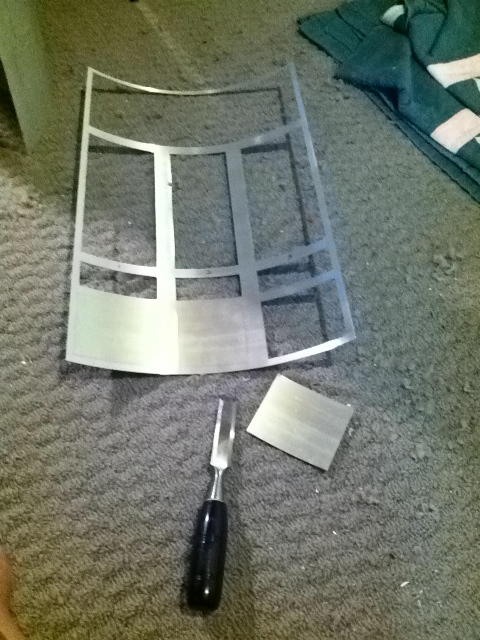 | ||
| The panels that are completely removed and not needed are pretty easy to remove with a sharp chisel. Just apply some pressure on the tab that holds it in place and off they come! |


 |
| I use an old screen for cleaning/drying pieces...the screen allows for excellent air flow. |
 |
| These are the aluminum slabs. Aluminum naturally clouds when not protected. We'll clean it up. |
 |
| This set of battery boxes has a removable back panel. We'll have to prime and paint the screw heads too |
 |
| Etching primer applied... |
 |
| I forgot I needed to prime the center foot side plates...I cleaned and added those to he to do list |
 |
| Primed the slabs, making sure to get the front, sides, top and bottom. The backside will not be seen and don't need paint |
 |
| And on goes the Rustoleum Satin White |


 |
| Ready, set...go! |
 |
| All cleaned up...I let it dry for 30 minutes in the warm sunshine |


 |
| The feet were primed when they first arrived a while back. Since they are steel, they needed to be rust proofed/primed! The bottoms have some wear which, after cleaned with acetone, needs to be touched up with more etching primer. |
 | |
| I have everything lined up...I also have some black primer I was considering using on the inside of the feet, if I felt they needed it. |
 |
| The inside of the shoulder horseshoes do not get paint. Some painters tape and trimmed with a razor makes this quick work. Then, wipe down and clean with acetone |
 |
| Protect those pretty bushings with painters tape! |
 |
| Foot detail pieces and side plate |
 |
| Outer ankles and center ankle ready for cleaning |
 |
| Knowing how the inside of the foot takes a lot of chips and nicks from the drive system, I went good and heavy with the primer. |
 |
| And...sometimes you go TOO heavy and wind up with a dribble...which, when dry in 30 minutes, while be sanded smooth with some 320 and 400 grit and primed again |
 |
| First coat of Rustoleum Satin White drying. This will get some sanding tomorrow with 400 grit to smooth it out |


