Sunday, April 7, 2013

Mounting the shoulder actuators

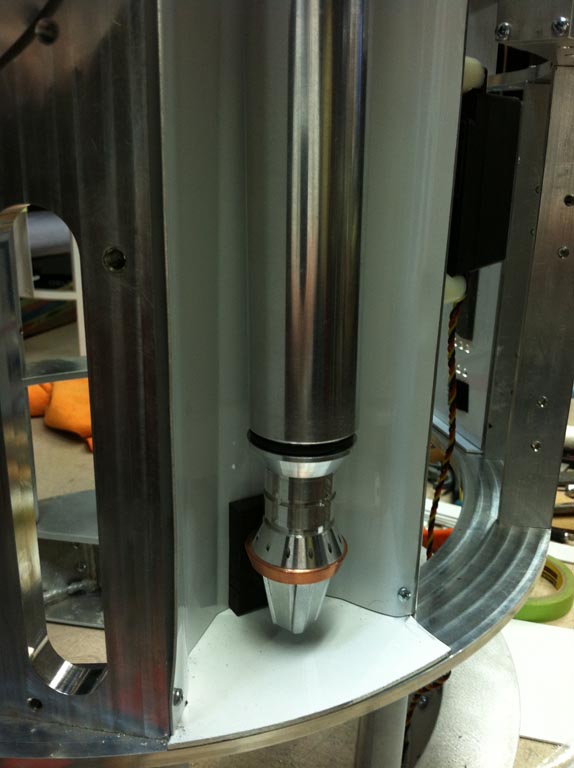
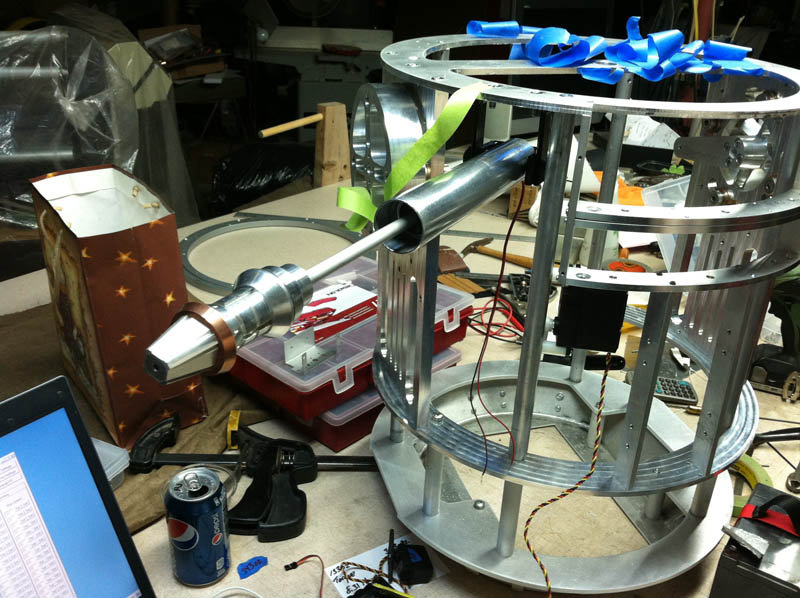
Over the past few weeks, I've been working with my machinist friend on some ideas on installing the linear actuators into R2's frame.  Originally the shoulders were designed to work with an actuator with a 3 inch stroke but the shoulders actually have a bit more movement than that...about 3.4 inches.  The way the shoulders work, the four bolts rotate thru the grooves.  They all for the shoulders to rotate back, when in 3-leg position and upright, in 2 leg.  They also also for a few degrees to tip forward, allowing us builders to articulate and create "body rocking/body movement".


I decided to go with 4 inch stroke actuators equipped with potentiometers.  In the closed position, they will put R2-D2 in it's 3-leg position.  Since the stroke is larger that the movement allowed (3.4 inches), I will use the data from the potentiometers to stop them before they exceed the travel allowed.  


Attaching the actuators to the shoulder levers went fine, although we decided to use a 1/4-20 sized bolt.


Since the potentiometer equipped actuators are longer than the original design, we had to come up with a way to fit them into the frame.  Before we could snub them into the lever, we had to do something about the bottom attach point.  We want the actuator to be straight for its vertical lifting and retracting.


To overcome this, we did two things:  We made mountings to bolt under the frame ring and small cut outs for the actuators to mount straight.


With that side done, it was on to the next....and now, the actuators are both installed!


Saturday, March 23, 2013

Dome gear, dome drive and more

Over the past week or two, I have been working on making more progress on R2-D2 #2.
With the dome plate made, it was time to make a dome gear out of aluminum, as I had done for the first droid.


I cleaned up the dome gear some and my friend, Fred, insisted it should be shinier, so he hit it with some steel wool.


For better clearance for the dome drive sprocket to spin under the dome gear, I added a washer to each spot the mounting screws came thru.

I'm using the Pololu 37D 67:1 motor which turns at 150 rpm.

We cut a sprocket out of Delrin (plastic) and used the hole pattern for the motor hub that Pololu sells.

To mount the motor, I used the Pololu motor bracket.  I just flattened it out and drilled some holes to attach it to the metal frame ring.


And here it is in operation...


Sunday, March 10, 2013

Making a [very cool looking] Dome Plate

As I get the second R2-D2's build back on track, one piece I did not have was the dome plate.  This is the part where all of the gadgets will mount to inside R2's dome.  For example, the periscope, the life form scanner and other things.

The one I have in the first R2 is a 1/8" inch thick dome plate.  While it works fine, I wanted something thicker the next time around. 

The great thing about being part of an R2 Building Club is the way people share their ideas with one another.  Another builder shared with me a drawing of a dome plate that was really well laid out and looked great.  Using the 1/4" inch aluminum, it has numerous grooves, holes and cut outs that reduce the weight of the finished piece.

Once I had a chance to review the drawing with my machinist friend, it was pretty clear we had a good amount of work ahead of us.  We had to tell the software what to cut thru, what parts to cut down an 1/8" of an inch, where to place tabs and so on.  This took about two hours to do.  Once we were happy with the calculations and previews of the end result, we created the g-code for the Mach 3 software.  The Mach 3 software takes that code and controls the X, Y and Z axis of the CNC machine.

Software loaded, everything is calibrated....
I purchased a 17 inch by 17 inch piece of aluminum plate from my local metal supplier.  Once the piece was clamped in and the CNC machine was calibrated, it was time to sit back and watch it work.


And watch, we did.  Since our CNC machine can only use one tool at a time, it did the entire piece with its 12mm cutting bit.  More advanced machines could change tools to remove move material with larger bits, getting the job done much quicker.  However, for us hobbyists, this works just fine despite taking a lot longer.

Specifically, this took 8 hours and 41 minutes to cut!  Then, another hour or so to remove all the tabs that hold many pieces in place until completed.

8 hours and 41 minutes later!
Once all the pieces that were no longer needed were removed, you can see how neat this part looks!


The original metal plate weighed just over 6 pounds.  After all the excess material was removed, the dome plate weighs 1.87 pounds.

To remove all the metal scratches and lines left from the cutting bit, I had a friend bead-blast it.


To protect the finish, we clear coat the dome plate...


Granted, the only time people will see this part is if R2's dome is off.  But, it was a great challenge to see if the CNC machine could make this piece!


Sunday, March 3, 2013

What's new so far in 2013

Over the past few months, I have been making R2-D2 parts for myself and other builders.  Side Vents and the Data Panels took up a lot of time but it was a lot of fun.  Working with my machinist friend, Fred, I've learned a great deal about working with aluminum, using a CNC machine and more.  After years of building with hacksaws, Dremels and so on, its fantastic to learn how to use bigger and better tools!

CNC machine cutting a Side Vent from 5052 aluminum

Making Data Panels
With my first R2-D2 functioning fine, I wanted to get back into getting the second one built.  Recall that the second one is going to be my "uber" or "ultimate" R2-D2.  Basically taking everything I learned building the first and making this one.   Once completed, the first R2-D2 will have its blue parts painted pink, giving me a "girl" R2 for patient visitors.

Over the past few days, with the assistance of my friend, we've installed the Data Port into the frame and made a surround piece that wraps behind the CPU Arm.  Back in December we also got the CPU Arm mounted and actuated.

Data Panel installed into the frame.

Bottom part of the CPU Arm enclosure

Gently peeling the protective plastic layer from the aluminum to glue a rubber stopper.

Surround enclosure installed

Looks great with the skin on. 

Rubber stopper prevent damage to the CPU Arm tip

Back view of the surround

The CPU Arm assembly we made required some trimming of the metal shaft to fit the door opening.  Then my friend came up with an ingenious way to mounting it all into the frame.

We had to take apart the metal CPU Arm and internal linkages to properly size them to fit the door opening.  We then fabricated an adapter to thread from the L16 Firgelli Actuator and the threading of the CPU Arm tip

The inside of the metal CPU Arm was filed to fit actuator inside, then we came up with a way to secure it inside.


Servo on the left doesn't have enough torque but the one on the left will.  The CPM Arm bracket  is ready to be installed


The CPU Arm hangs directly over the frame ring, so it won't be in the way of the skins nor the mechanisms behind it.  You can see the two levers, one of which the large servo will attach to.


Close up

Arm pivoted out
Drilling and tapping two holes into the frame rod to attach the large servo to.

Servo installed, linkage from CPU Arm lever attached.  Now to attack to the servo

Testing it out, plenty of power to lift the CPU arm...and the actuator pushes the probe out


Friday, November 16, 2012

Aluminum half moons and dome panels ready!

Today the aluminum half moons arrived, which are the large details pieces that fit on the feet.

In an effort to reduce weight, I was going to use resin ones but had some concerns how well they would hold up in the center foot.  In there, the half moons are how the caster mounting plate stays attached.  Drilling and tapping resin pieces isn't nearly as solid as aluminum.

As it turns out, one of the R2 Builders had just done a part rum of the aluminum half moons and had extras available.  Even better, these are the "diet" version, where additional material has been cut away to lighten the part.

Note the back of the piece has had a lot of excess material removed to reduce weight
The temperature in my part of Maine was 29F so the days of painting outside are long gone.  So, I turned on the heater and then set up some proper ventilation to prime and paint them...


Once the paint fumes had been vented outside, I was able to jump back to work on the dome panels which all needed some polishing.

Despite taking a LOT of pictures, the shininess made for a lot of out of focus pics! 

Tomorrow I'll work on testing out the new airbrush and if that goes well, prep and work on getting the panels that get blue paint done!


Tuesday, November 13, 2012

More dome panel work and CPU Arm arrives!

Tonight I did some more sanding on the dome panels, finishing up using 1000 grit and 1500 grit.  Now we're starting to see if I should polish with the Mother's polish or not.
These haven't been polished yet and I'm awful tempted to leave them as is....naaah


These I used the Mother's aluminum polish and drill-power buffer
Also, today the CPU Arm arrived, this one being made entirely of aluminum.  Its going to be a bit of a challenge to motorize and actuate in and out of R2's panel opening....but I'm sure I can sort something out.


The previous R2-D2 has a resin-version of the CPU arm.  This metal one mimics the one seen in the various scenes of the the original Star Wars:  A New Hope film.

Screen capture from R2-D2 plugging into a Death Star computer terminal

I'll have to slow-motion a few scenes to be sire of what gets painted where....but it looks promising!