Back in 2011, I had purchased a JAG foot drive for this droid, identical to what is in my first droid. That drive system takes the output from the motor, gears it down via a belt drive to the wheel. The housing fits perfectly in the foot shell and the drive system uses a motor that is extremely easy to acquire. Where this is using one drive wheel, a caster wheel is used to keep R2 level.
 |
| Original JAG Foot drives |
Fast forward to 2013 and Jerry Greene has improved his design, now featuring "four wheel drive". Meaning, the 2 wheels in each foot will be powered, no more dragging a caster wheel inside. Those have been problematic for me, sometimes causing R2 to get stuck trying to cross uneven surfaces.
When Jerry first posted pictures of the prototype, many of us were interested!

The benefits of this drive kit over the previous one is simple: More power! Better ability to cross uneven surfaces, since both wheels are powered and no caster wheel causing issues binding or not being level.
And...it makes having R2 in 2-leg mode a bit easier. R2 will be level, standing on 4 identical tires!
The kit has a fair amount of parts but between the exploded-view drawing Jerry includes and pictures of a step-by-step assembly, it goes together fairly smoothly.
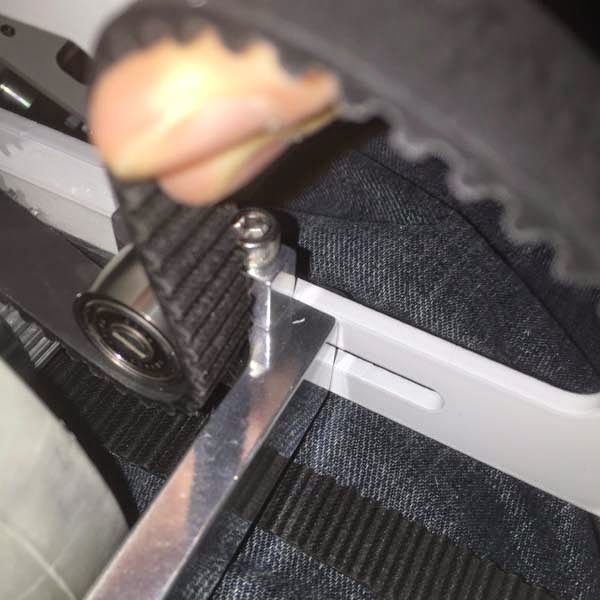
There certainly are some tight spots to deal with, such as maneuvering a wrench around four closely spaced hex heads!
 |
| Some tight spots for tools! |
 |
| Laptop showing the assembly photos while Mokey supervises |
This is all a test fit for the most part, since some dis-assembly will be required later. Later, I will need to drill holes in the foot shells to mount the assembly into it.
On to the assembly...


The belt pulley mount was an interesting challenge. The housing makes getting the allen wrench in there a bit tricky! Then, once you have the pulley mounted and the belt tight, you can't help but notice how tight the clearance is. While hard to see in this photo, the belt comes close to the adjustable wheel mount (shiny piece). It looks good, I don't think it will rub.
The finished drive kits!

In a few weeks I hope to have the motors on hand to complete the fit test. I want to make sure the belt will work out alright.
Once that is completed, then the next step will be the installation into the foot shell!
Thanks for reading....progress continues!